

Comprehensive CI/CD with Jenkins - Basic
Jenkins Setup on Linux, Continuous Integration, ContinuousDelivery vs ContinuousDeployment, Jenkins Shell, WebHook, Git Integration, Freestyle, Docker


Jenkins isn't new. Since the day you joined the tech, you must have at least heard the word Jenkins if not then have patience and just get started with this article and by the end of this you will be understanding almost everything starting from What is Jenkins to an E2E pipeline and complete deployment solution. This will be coming in two parts.
What and Why Jenkins?
Jenkins is a versatile open-source automation server built in Java that streamlines software development by enabling developers to build, test, and deploy code with ease. With pre-built packages for integration, testing, and deployment technologies available on a single unified platform, Jenkins provides a powerful solution for managing the software development lifecycle.
However, it is not limited to developers or someone who writes code only. Anyone can use it to automate several tasks possible. So consider it an automation tool with versatile use cases.
It is open source and free of cost, which means you don’t have to worry about procurement costs for code pipelines.
It is user-friendly, easy to install and does not require additional installations or components. You can also update it easily with its built-in GUI tool.
It is easily configurable and can be modified and extended with over 400+ plugins that support building and testing virtually any project. You can also integrate it with various tools and platforms such as LambdaTest, GitHub, Docker, etc.
It is platform-independent, which means you can run it on any operating system that supports Java.
It can help you modularize your CI/CD pipeline by breaking it down into smaller, reusable pieces that make your pipeline more efficient and easier to maintain. You can also use Jenkins Pipeline to define your pipeline as code and store it in version control.
It can help you detect errors as soon as possible by deploying code instantly and generating test reports. You can also automate various tasks such as notifications, feedback, etc. with Jenkins.
CI(Continuous Integration)
Continuous Integration (CI) is a software development practice that involves regularly merging and testing code changes into a shared repository. The main objective of CI is to catch and resolve integration issues early in the development cycle, which can save significant time and effort in the long run. With Continuous Integration teams adopt more agile development methodologies, as it allows for rapid iteration and frequent releases. With CI in place, developers can quickly validate their changes and receive feedback on their work, which can help them improve the quality of their code and rectify it at the earliest.
In a typical CI workflow, developers regularly commit code changes to a shared repository, which is then automatically built and tested. The results of the build and tests are then reported back to the team, allowing them to quickly identify and fix any issues that arise. By continuously integrating and testing code changes, teams can ensure that the software is always in a releasable state, with fewer bugs and less technical debt.
CD(Continuous Deployment VS Continuous Delivery)
Under continuous delivery, you have a release-ready build artifact that can be deployed to any environment at any time. You can choose when and how to release your software based on your business needs and feedback. You can also use different release strategies such as feature flags, canary releases, etc. to control the rollout of your software**.**
Under continuous deployment, you have an automated pipeline that deploys every change that passes the testing phase to production. You don’t need a manual intervention or approval to update your software. You can deliver value to your customers faster and more frequently, but you also need to ensure the high quality and reliability of your software.
To conclude: in Continuous Deliver you need manual intervention up to some extent whereas in Continuous Deployment you do not need any kind of manual intervention, anything that passes the test goes to production.
Jenkins Installation on Ubuntu
Step-1(Java Installation)
Before installing Jenkins we need java as Jenkins is based on java and to do so run the below command:
sudo apt install openjdk-11-jre
Step-2(Jenkins Installation)
curl -fsSL https://pkg.jenkins.io/debian-stable/jenkins.io.key | sudo tee \
  /usr/share/keyrings/jenkins-keyring.asc > /dev/null
echo deb [signed-by=/usr/share/keyrings/jenkins-keyring.asc] \
  https://pkg.jenkins.io/debian-stable binary/ | sudo tee \
  /etc/apt/sources.list.d/jenkins.list > /dev/null
sudo apt-get update
sudo apt-get install jenkins
sudo apt update
Step-3(Start Jenkins)
Enable jenkins using the below command:
sudo systemctl enable jenkins
Once enabled then start Jenkins using the below command:
sudo systemctl start jenkins
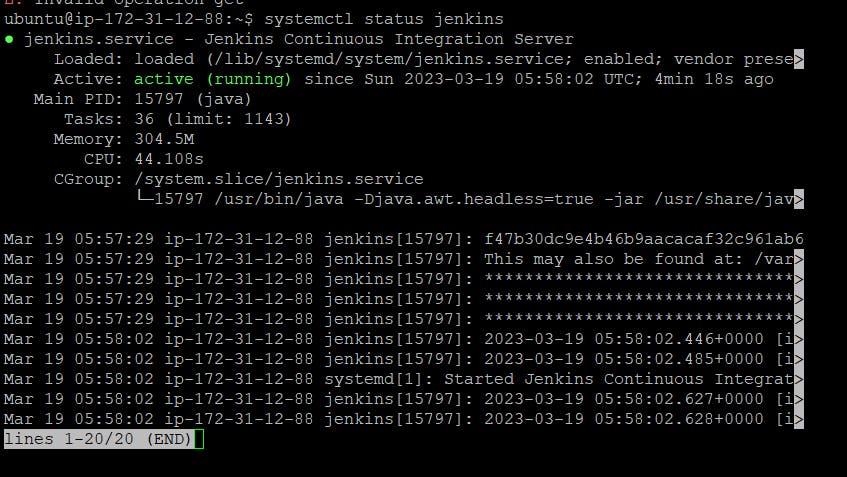
Using the below command you can check if Jenkins is up and running:
systemctl status jenkins
And if everything is fine then you will see the status as below:
Step-4(Editing inbound rule to access Jenkins UI from the browser)
Edit the inbound rule and allow access to port 8080.

Then access Jenkins UI using :
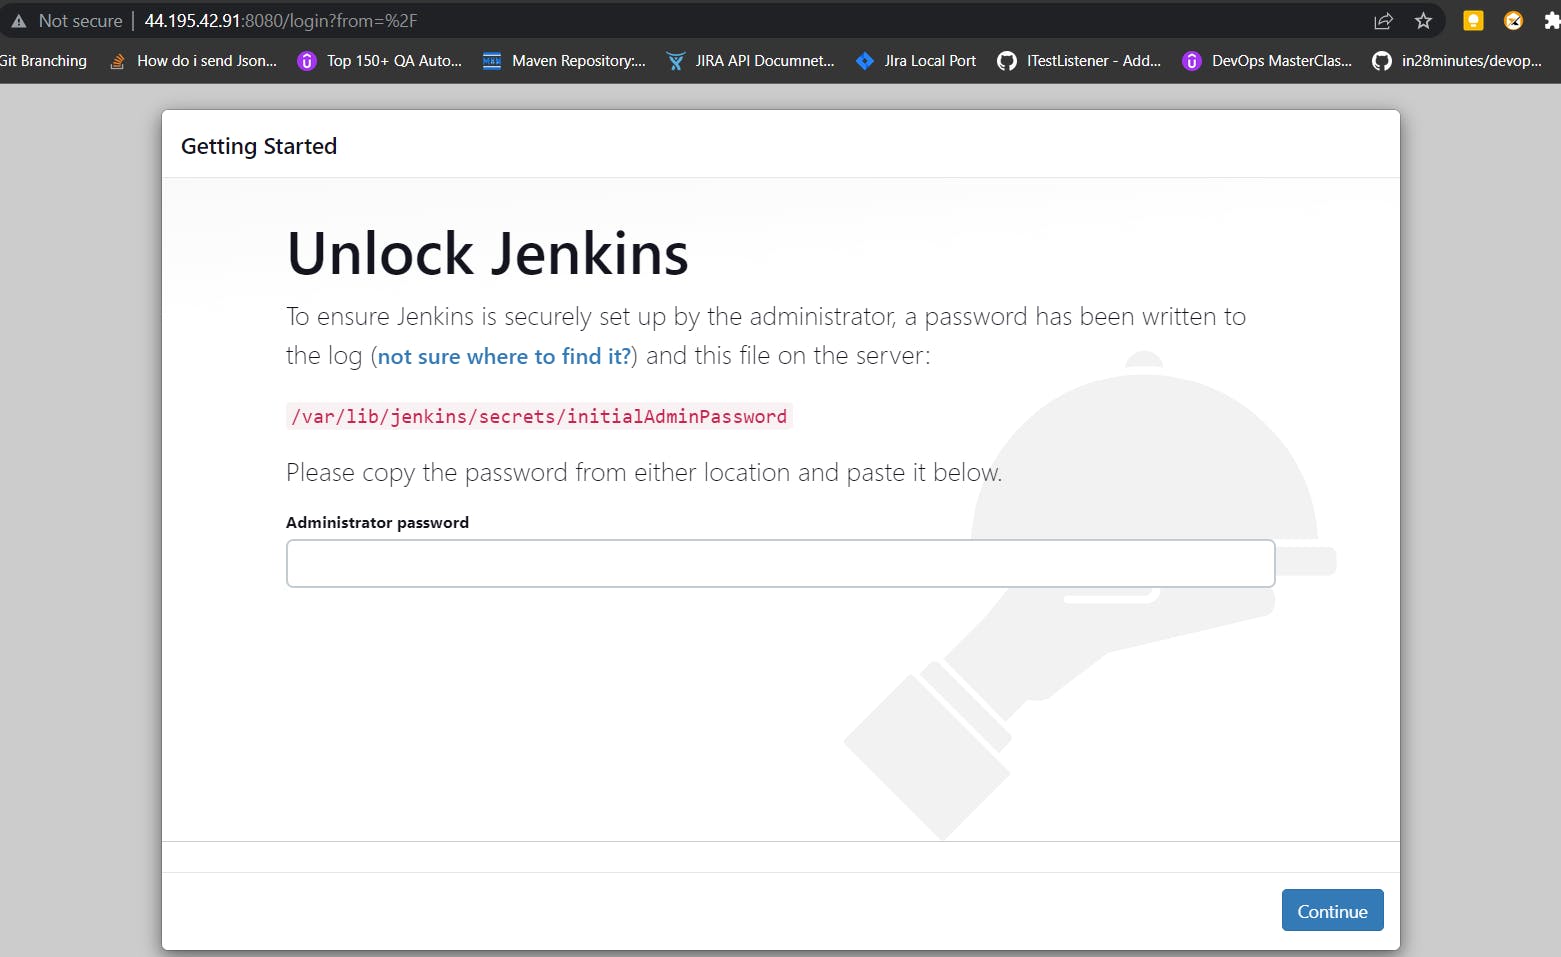
Step-5(Accessing Initial Password to Proceed)
sudo cat /var/lib/jenkins/secrets/initialAdminPassword command will show the initial password that you can paste here and proceed. And then install the suggested plugins.
Configure your username passwords and you are good to GO!
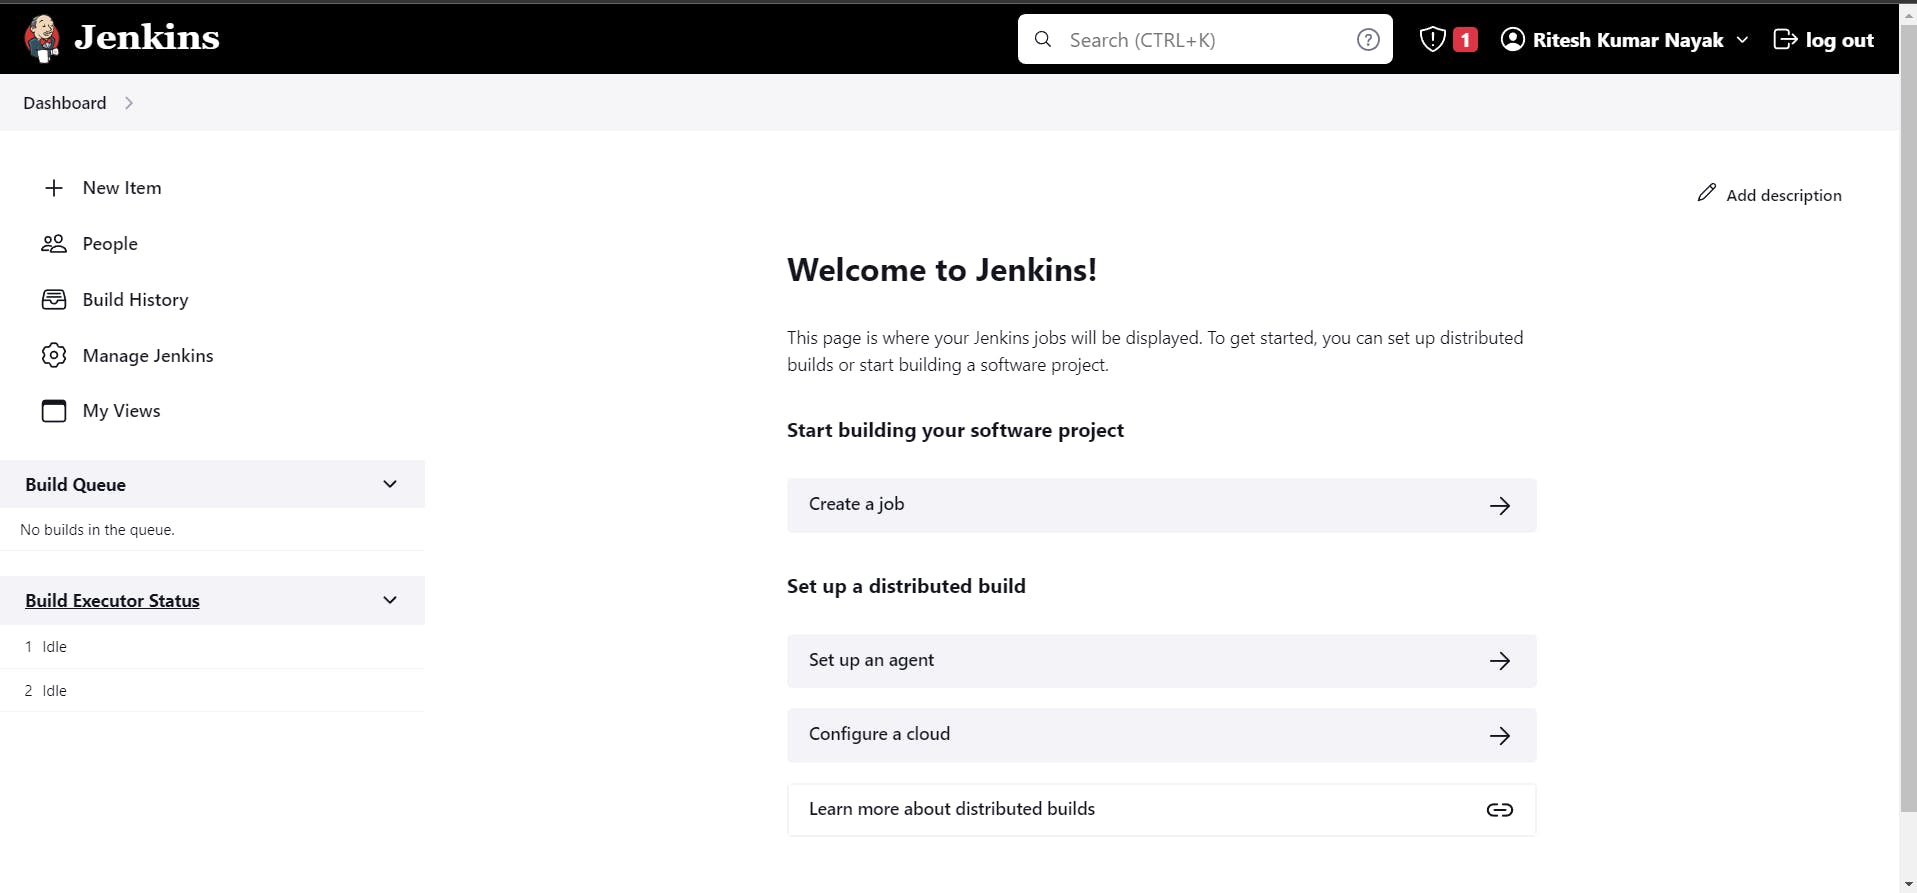
What is a JOB in Jenkins?
A Jenkins job can be thought of as a single unit of work that is performed by the automation server. Jobs are typically created by defining a series of build steps that are executed in a specific order, such as compiling code, running unit tests, and packaging the application. Each build step can be configured to perform a specific action, such as running a shell script, executing a command, or calling a plugin.
Types of JOBs in Jenkins
Freestyle project: This is a basic Jenkins job that can be used to execute a series of build steps. It provides a lot of flexibility and can be used to perform any task that can be scripted or automated.
Pipeline: This is a more advanced job type that allows you to define a series of stages and steps to perform for each stage. It provides more structure and control over the build and deployment process and can be used to create complex workflows.
Multibranch Pipeline: This is a pipeline job type that can automatically detect and build branches in a Git or other version control system. It can be used to build and test code changes as they are committed to the repository.
Maven project: This is a job type that uses the Apache Maven build system to build and manage Java-based projects. It can be used to build, test, and deploy Java applications.
Freestyle matrix project: This is a job type that allows you to run the same build with different configurations, such as different operating systems or browsers.
Parameterized build: This is a job type that allows you to customize the build by specifying parameters such as build version, target environment, or other variables.
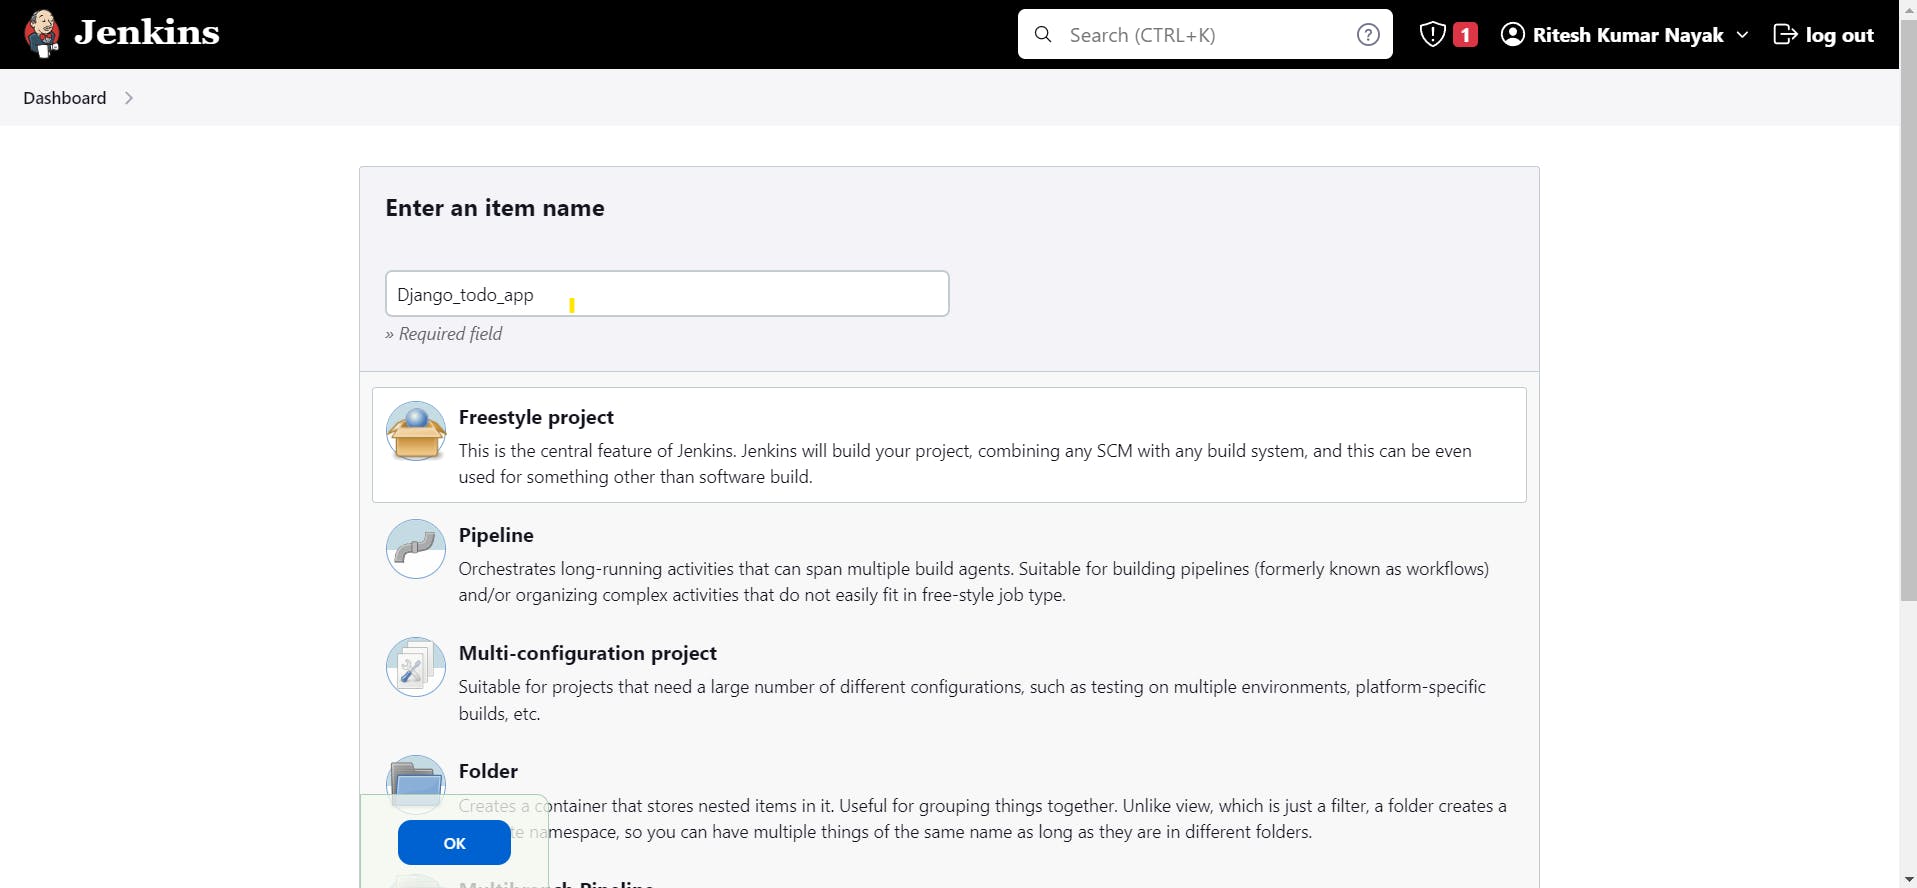
Creating a Freestyle project
As we got to know and over-view above about the freestyle project, we'll get started with the hands-on illustration of Freestyle first and then will be moving forward.
So, to get started we need to choose the freestyle project mode of creating a pipeline as below with a project name Django_todo_app :
Once you have chosen the freestyle we have to configure as below:
General Configuration and explanation
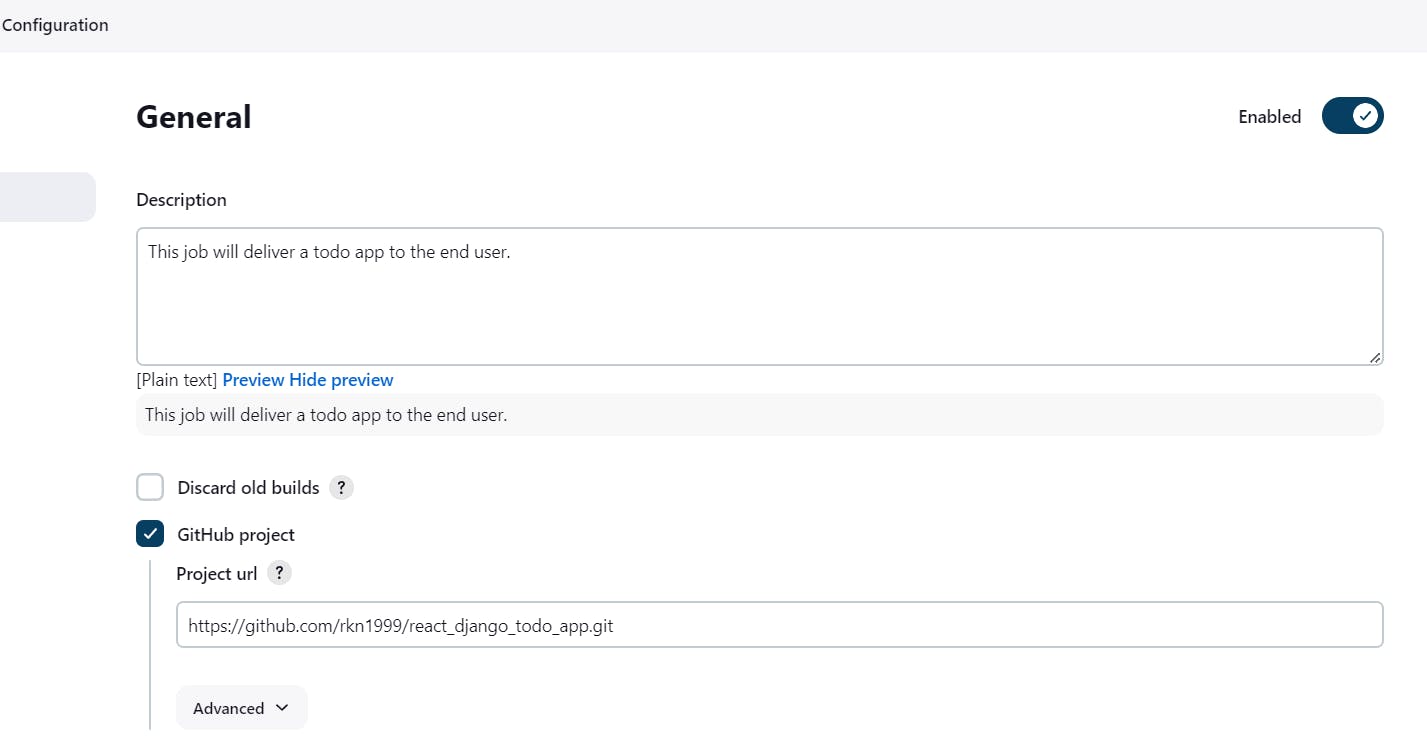
You need to give some details about your project in the description section.
The "Discard Old Builds" feature in Jenkins allows you to specify how many old builds to keep and when to remove them. By default, Jenkins keeps all build records and artifacts, but this can take up a lot of disk space over time. The "Discard Old Builds" feature is useful for managing disk space and keeping the Jenkins server organized, particularly for organizations with large or long-running projects. By setting reasonable limits on the number and age of builds to keep, you can ensure that your Jenkins server runs efficiently and effectively. For now, we are not discarding the builds as we need to keep a track of the projects.
The "GitHub Project" option in Jenkins is used to associate a Jenkins job with a GitHub repository. When this option is configured, Jenkins will display a link to the corresponding GitHub repository on the job's main page, and will also display build statuses and other information from GitHub on the Jenkins job page. So, we have provided our GitHub URL from where the code will be picked.
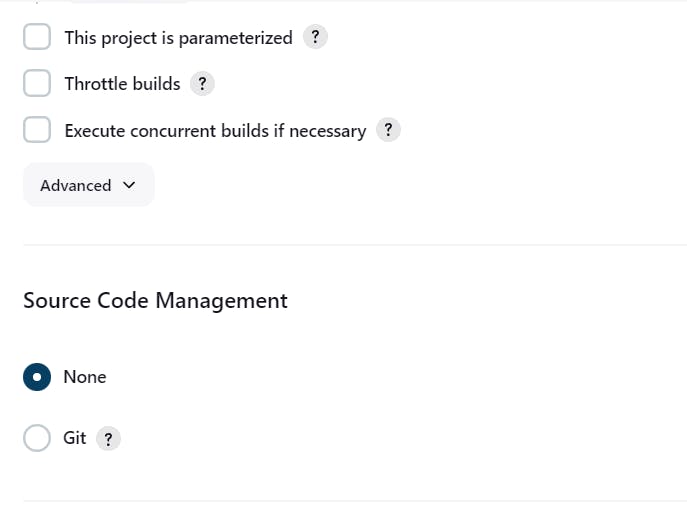
The "This project is parameterized" option in Jenkins allows you to add parameters to your Jenkins jobs. When this option is enabled, Jenkins will prompt the user to enter parameter values before starting a build. This allows you to create more flexible and configurable Jenkins jobs that can be customized for different use cases or environments.
The "Throttle Builds" option in Jenkins allows you to limit the number of concurrent builds that can be run for a particular job or set of jobs. This is useful for managing resources on your Jenkins server and ensuring that multiple builds do not consume too many resources simultaneously.
The "Execute concurrent builds if necessary" option in Jenkins allows multiple builds of the same job to be run simultaneously. This option can be useful in situations where multiple teams or developers are working on the same project and need to run builds at the same time.
Source Code Management

In source code management we configure our GitHub repository from where the codes will be fetched.
The "repository" URL is self-explanatory, it takes the URL for the git repo.
"Credentials" are given when you are trying to access code from a private repository. You can create and manage credentials in Jenkins by going to the "Credentials" page from the Jenkins home page. From there, you can add new credentials, update existing ones, or remove them as needed. Jenkins supports a variety of credential types, including usernames and passwords, SSH keys, and secret text values.
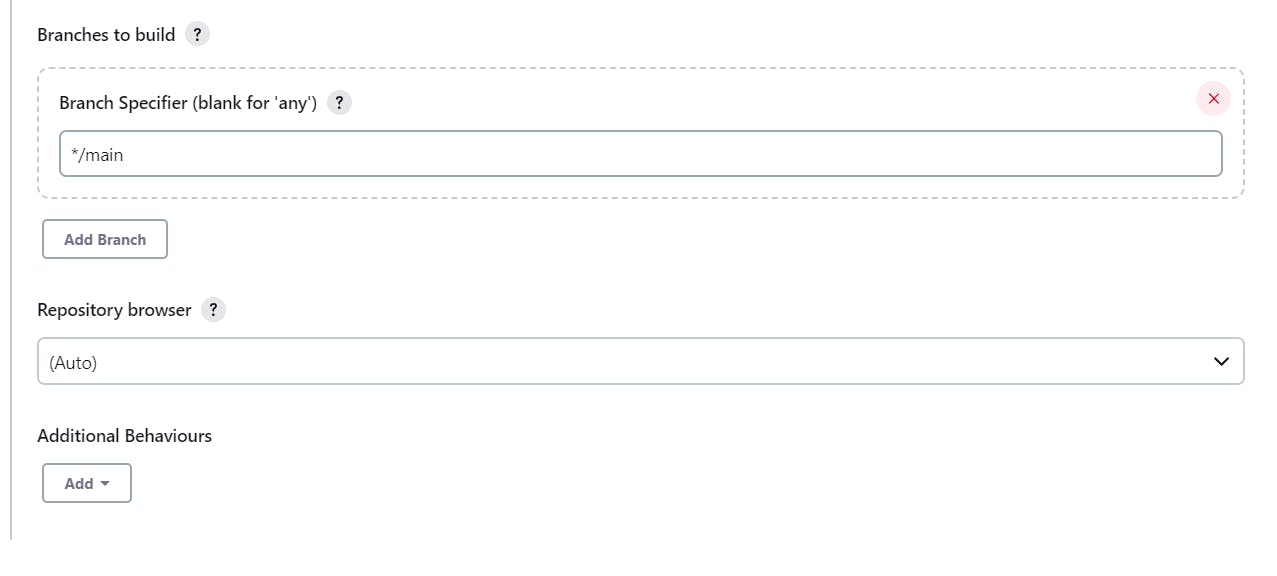
The "Branches to build" option in the Source Code Management section of a job's configuration allows you to specify which branches of your source code repository should trigger a build when changes are detected. When you configure this option, you can enter one or more branch names, or you can use patterns to specify multiple branches at once. For example here, we have entered "main" to build the main branch. It can be any branch name.
The "Repository Browser" option allows you to view the details of a specific revision of the code in the repository, such as the commit message, author, timestamp, and changes made. This can be useful for troubleshooting build failures or verifying that the correct version of the code was used in a build. Jenkins supports several different Repository Browsers, depending on the type of version control system you are using. For example, for Git repositories, Jenkins supports browsing the code using the Gitweb or GitHub web interfaces, among others.
Build Triggers
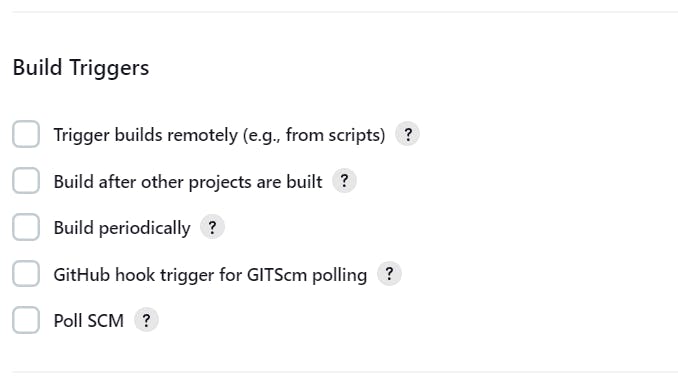
The "Trigger builds remotely" option in Jenkins is a feature that allows you to trigger a build of a specific job remotely, without the need to manually start it from the Jenkins interface. This option is useful when you need to automate the build process and integrate it with other tools or scripts. When enabled, Jenkins generates a unique URL that can be used to trigger the build remotely via an HTTP POST request.
The "Build after other projects are built" option in Jenkins' Source Code Management configuration allows you to specify that a particular job should only be built after other specified jobs have been successfully built. This option is useful when you have a set of interdependent jobs and you want to ensure that they are built.
The "Build periodically" option in Source Code Management (SCM) refers to the ability to schedule builds to run at specific intervals. This option is available for jobs that are configured to use a version control system, such as Git or SVN, to manage their source code. This option can be useful for jobs that need to run regularly, such as nightly builds or automated tests. By automating the build process, you can save time and reduce the risk of human error.
The "GitHub hook trigger for GITScm polling" is an option in Jenkins that enables the automatic triggering of builds whenever changes are pushed to a GitHub repository. This option is used in conjunction with the Git plugin in Jenkins and the GitHub webhook feature. When you enable "GitHub hook trigger for GITScm polling" for a Jenkins job, Jenkins will listen for push events from the GitHub webhook and automatically trigger a new build whenever changes are pushed to the specified repository. This ensures that your Jenkins job always runs the latest version of your code, without the need for manual intervention.
The "Poll SCM" option in Jenkins Source Code Management (SCM) configuration allows Jenkins to periodically check the version control system for changes and trigger a build if changes are detected. When you enable this option in a Jenkins job's SCM configuration, Jenkins will automatically schedule a periodic check to determine if the source code has been updated. By default, Jenkins will check for changes every minute, but you can adjust the frequency of polling to suit your needs. When Jenkins detects changes in the source code, it will trigger a build of the job. This can be useful for continuously building and testing your code as changes are made, ensuring that any issues are caught early in the development process.
NB: the GitHub hook trigger for GITScm polling and Poll SCM do the same job it's just that I have installed the GitHub integration plugin in Jenkins hence you are seeing the GitHub hook trigger for GITScm polling. If you have not installed the plugin then you can only see Poll HCM.
Build Environment
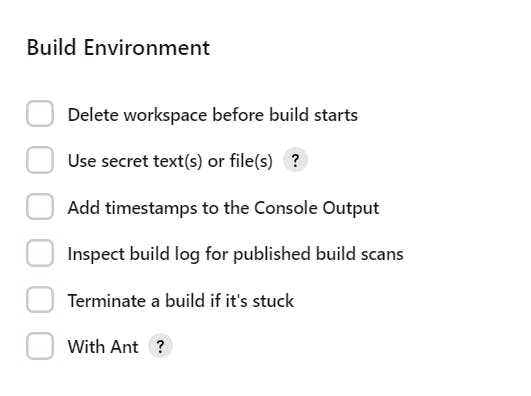
In Jenkins, the "Build Environment" option in Source Code Management (SCM) is used to set environment variables or perform additional setup tasks before the build is started.
For example, if you have a multi-module project with each module having its own repository, you might want to set environment variables to specify the location of each module's repository before starting the build. In this case, you could use the "Build Environment" option to set these variables.
Another use case for the "Build Environment" option is to perform additional setup tasks before the build, such as configuring authentication credentials for the SCM or setting up a virtual environment for the build.
Build Steps & Post Build Actions
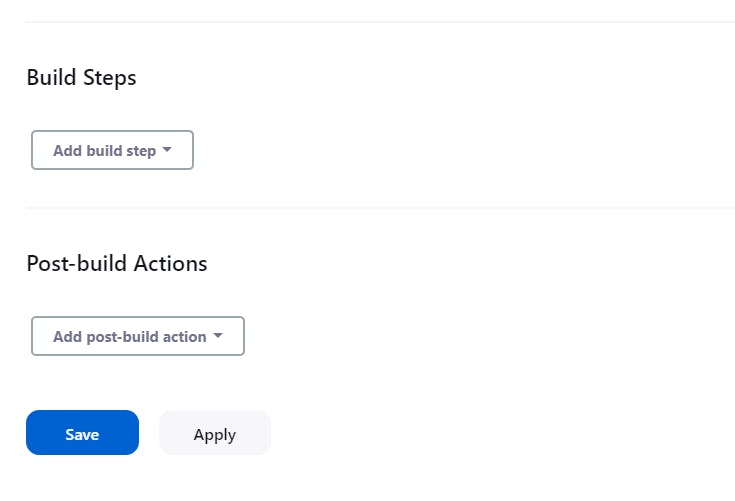
the Build Steps option in Source Code Management (SCM) refers to the series of tasks or actions that need to be performed to build the project after the source code has been checked out from the repository. The Build Steps typically include tasks such as compiling the code, running tests, generating documentation, packaging the application, and deploying it to a test or production environment.
The Post Build Actions option in Jenkins allows you to define additional actions that should be taken after the build has been completed. These actions can include archiving artifacts, sending email notifications, triggering other builds, or publishing the build results to external systems.
By using these options in combination, you can automate the entire build process and ensure that your project is built, tested, and deployed consistently and reliably every time changes are made to the source code.
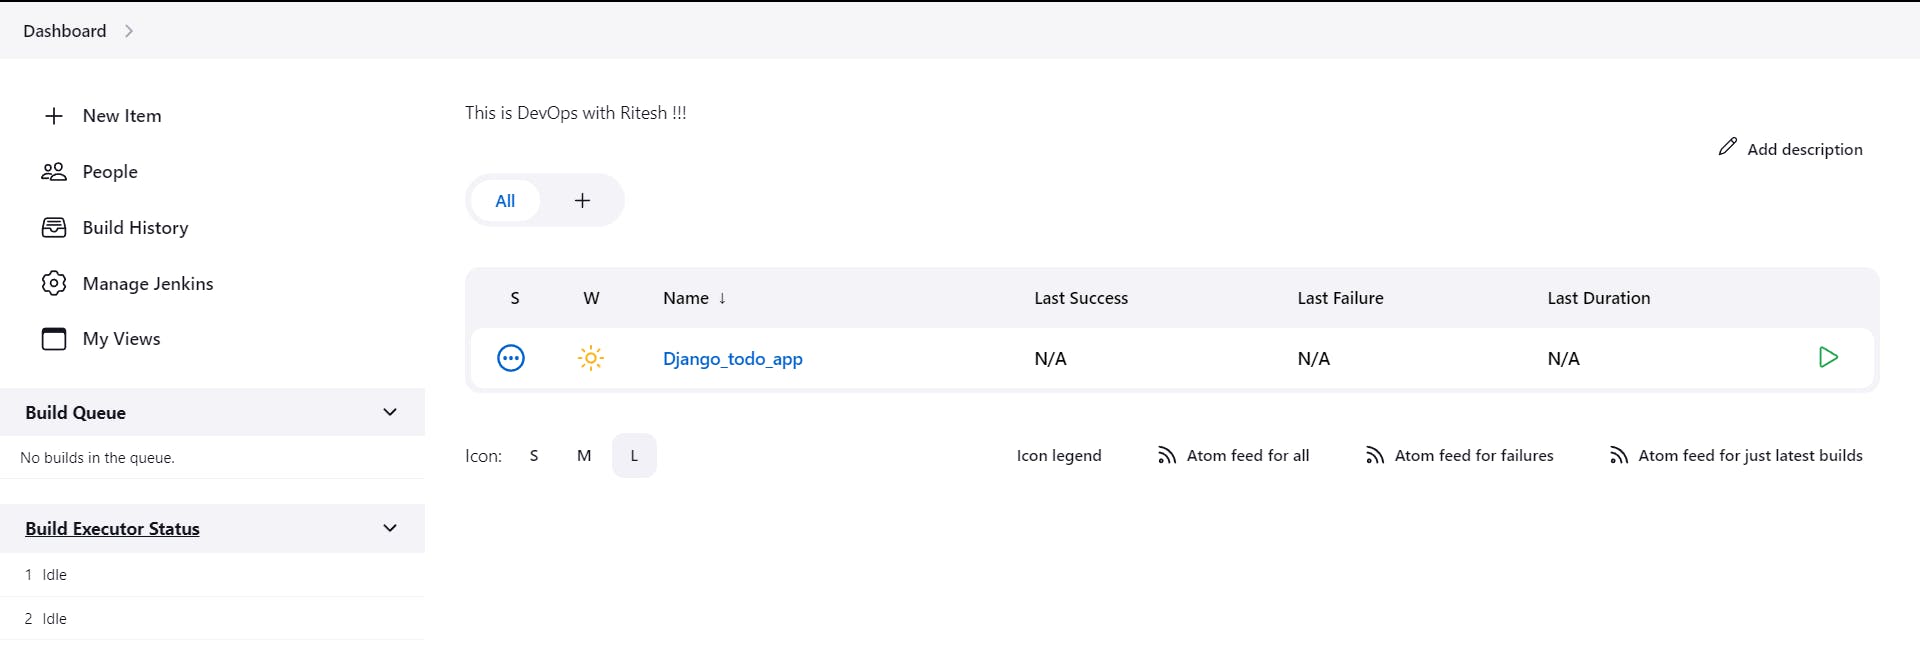
Once everything is setup properly you can see a job on the dashboard as below:
Running the Job Manually(Continuous Delivery)
Once this job has been created we will be running it for the first time to check if everything is ok by clicking on the play button. And the console output is something as below on success, we can name it as Continuous delivery as there is manual intervention:
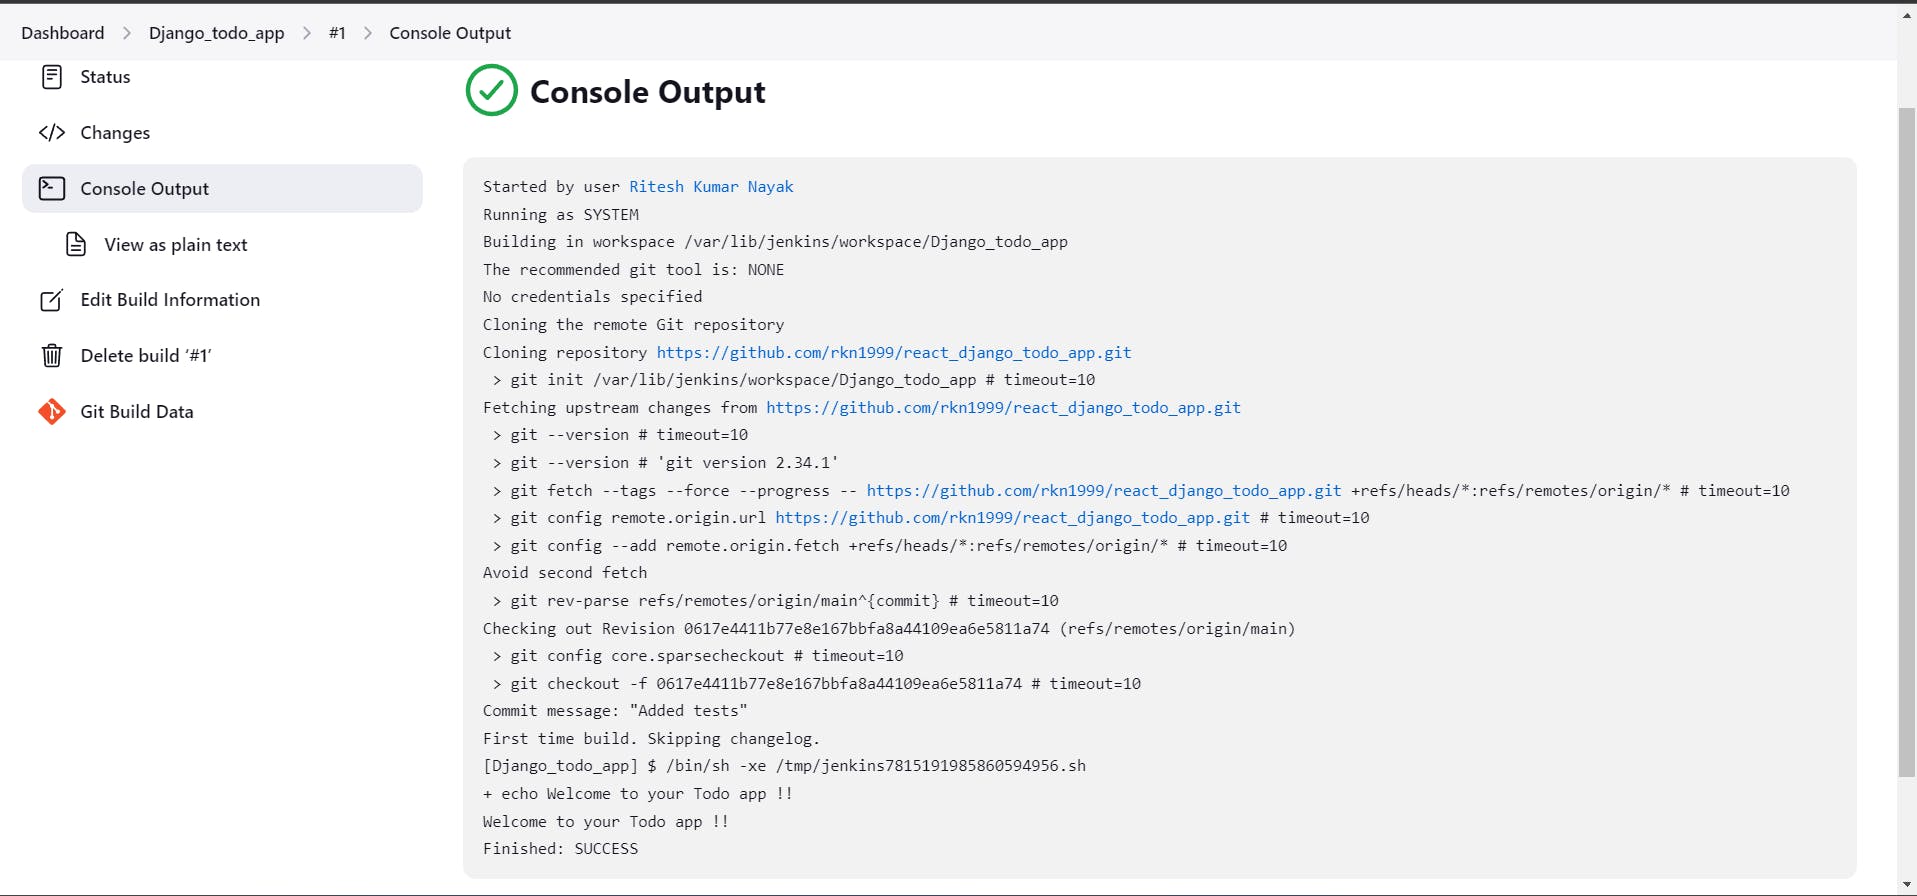
As you can see in the console this job just cloned the code from the git repo and placed it in /var/lib/jenkins/workspace/Django_todo_app .

As you can see in the above image we have got all the files pulled from GitHub. We have 2 files named Dockerfile and docker-compose.yaml which can be used to deploy the app.
Running the docker container through Jenkins Shell
From previous blogs, we know how containerization helps in deploying applications. Previously we used to run the scripts explicitly from the Linux CLI however, now we can integrate these scripts with Jenkins so that when the build starts, Jenkins will pull the code, run the script and deploy the changes.
Before running the scripts from Jenkins Shell we need to add Jenkins to the user group so that there won't be any permission errors. And to do so we can you the below command in the Linux CLI and reboot the system to :
sudo usermod -aG docker jenkins
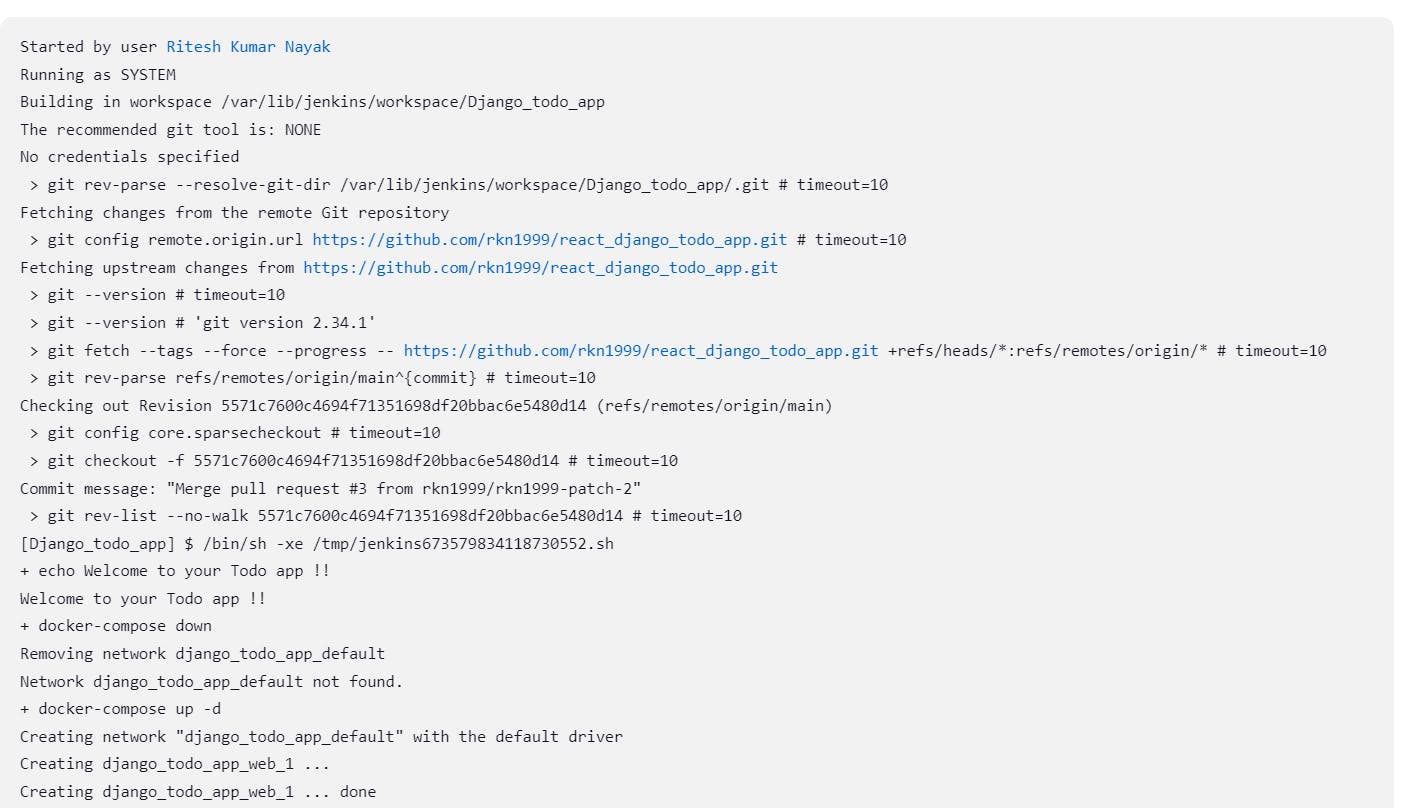
Now put the below piece of code in the Jenkins Shell in the build step and save the changes.
docker-compose down
docker-compose up -d

This will first make sure all the existing containers are down and then will run the docker file.
Now you can see in the below picture that docker has been started through the script written in Build Step:
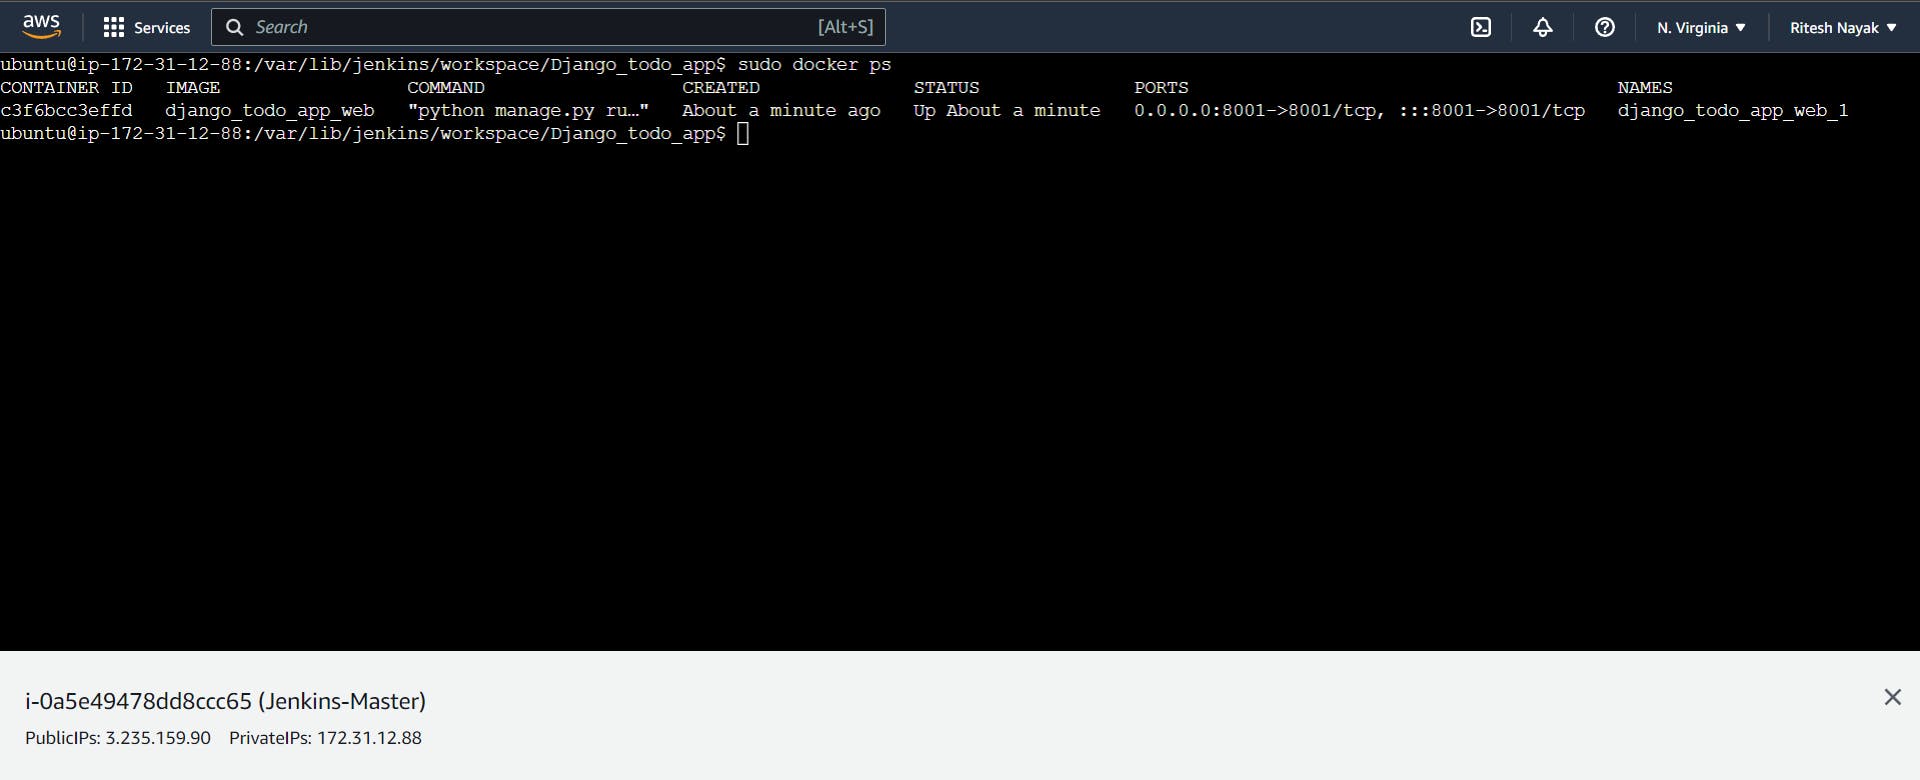
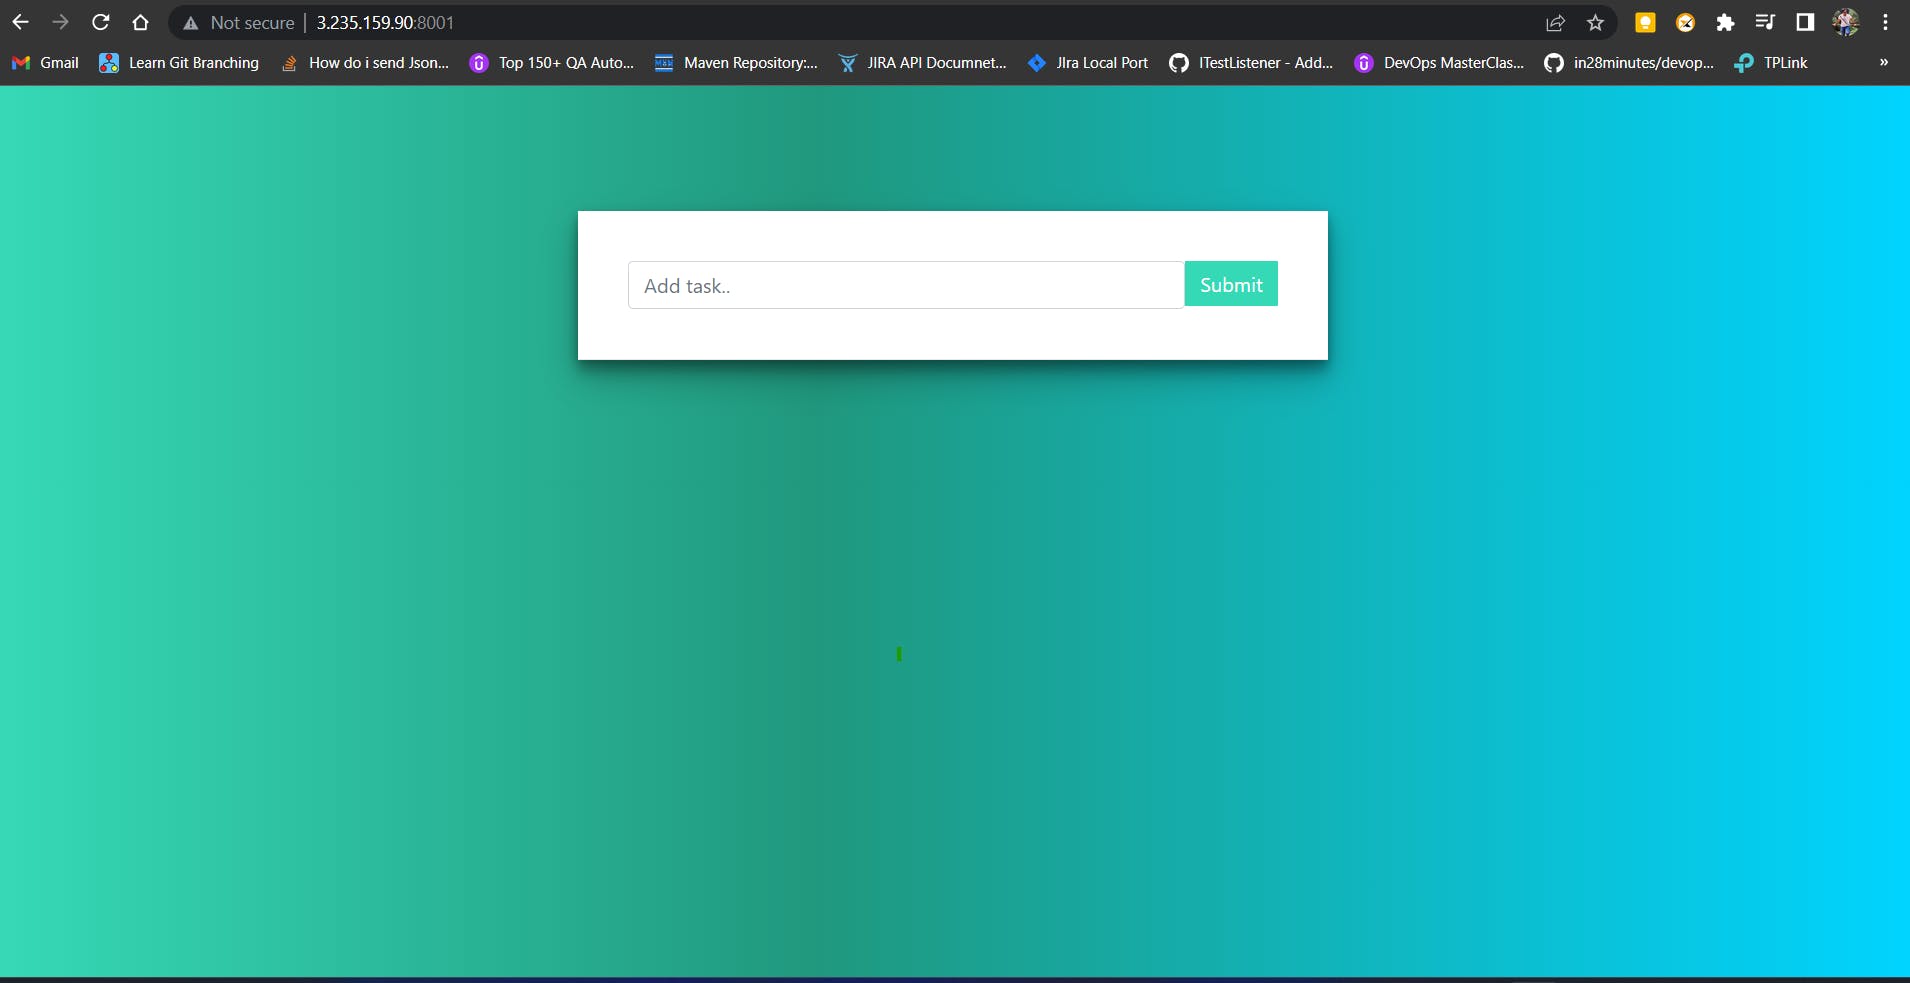
Now after editing the inbound rule and allowing port 8001, you can see we can run the app at port 8001.
GitHub WebHook
On all the above operations we have been hitting the Build button manually to start the build then only code gets pulled from Git, containers are built and other events happen. However, when it comes to Continuous Deployment, the manual intervention has to be eliminated and to achieve that we have GitHub WebHook.
A GitHub webhook is an automated event notification that is triggered when certain events occur on a GitHub repository, such as the creation of a new branch, a new commit, or the opening of a new pull request.
When a webhook is set up, GitHub sends a POST request to a specified URL each time the event is triggered, and the receiving application can then take actions based on the information contained in the payload of the request.
Webhooks can be used to automate various tasks and integrations, such as triggering a continuous integration/continuous deployment (CI/CD) pipeline, updating a project management tool, or sending notifications to a messaging platform.
Creating a WebHook
Install GitHub Integration Plugin in Jenkins
Go to the repository and in settings go to webhooks. In the Payload URL give the Jenkins Server URL followed by
/github-webhook/as shown below so that Jenkins will be notified when there is a change in react_django_todo_app repository.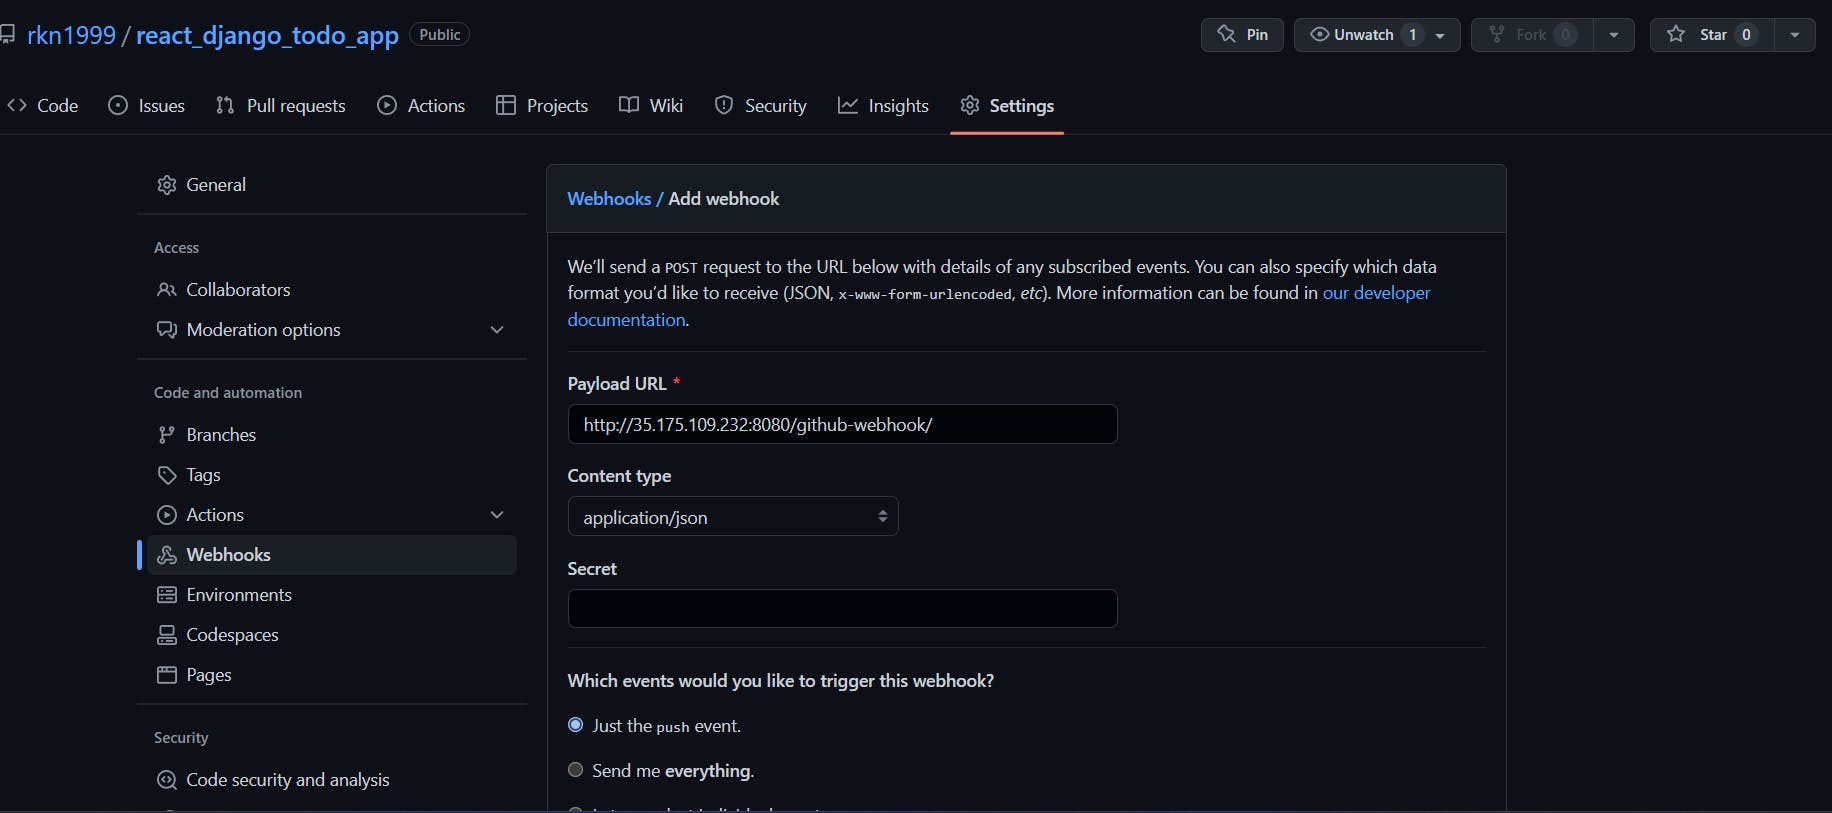
Here it is chosen "Just the push event" which means, Jenkins will be triggered only when there is a push event occurs.
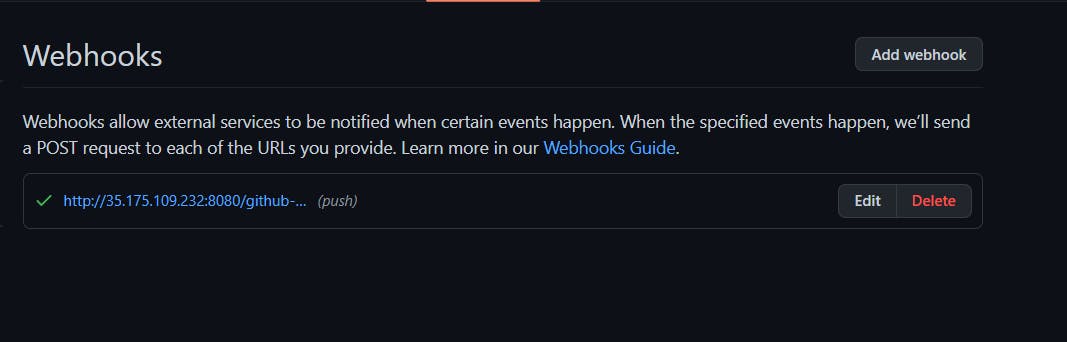
Once you add the webhook, it should be tick marked as below which means the connection between the Jenkins server and GitHub has been established.
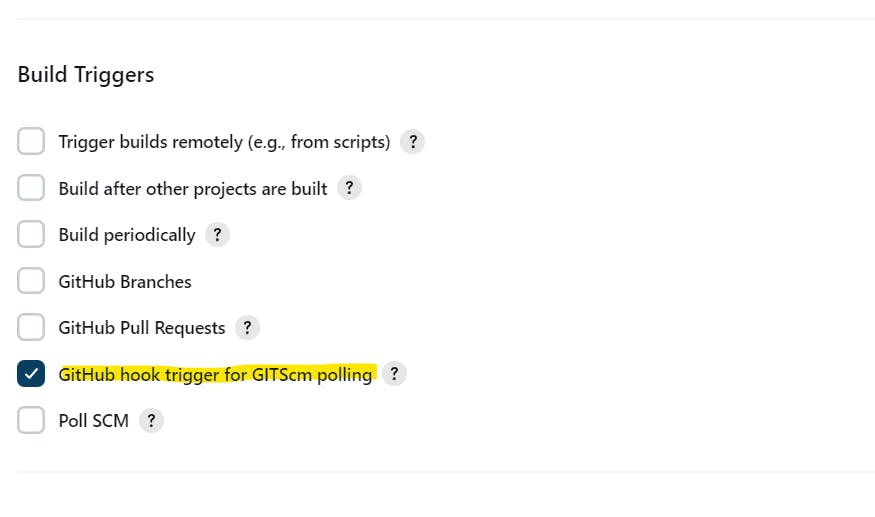
After creating the webhook make sure you have enabled "GitHub hook trigger for GITScm polling" as below otherwise Jenkins won't be notified.
Running the build from WebHook
Once all the above steps are completed make some changes in the code in GitHub and push the code, after the code is pushed you can notice that the build will automatically execute without any manual intervention.
- Below I have made changes to the index.html file and committed the changes.

- Right after committing the changes, the execution started
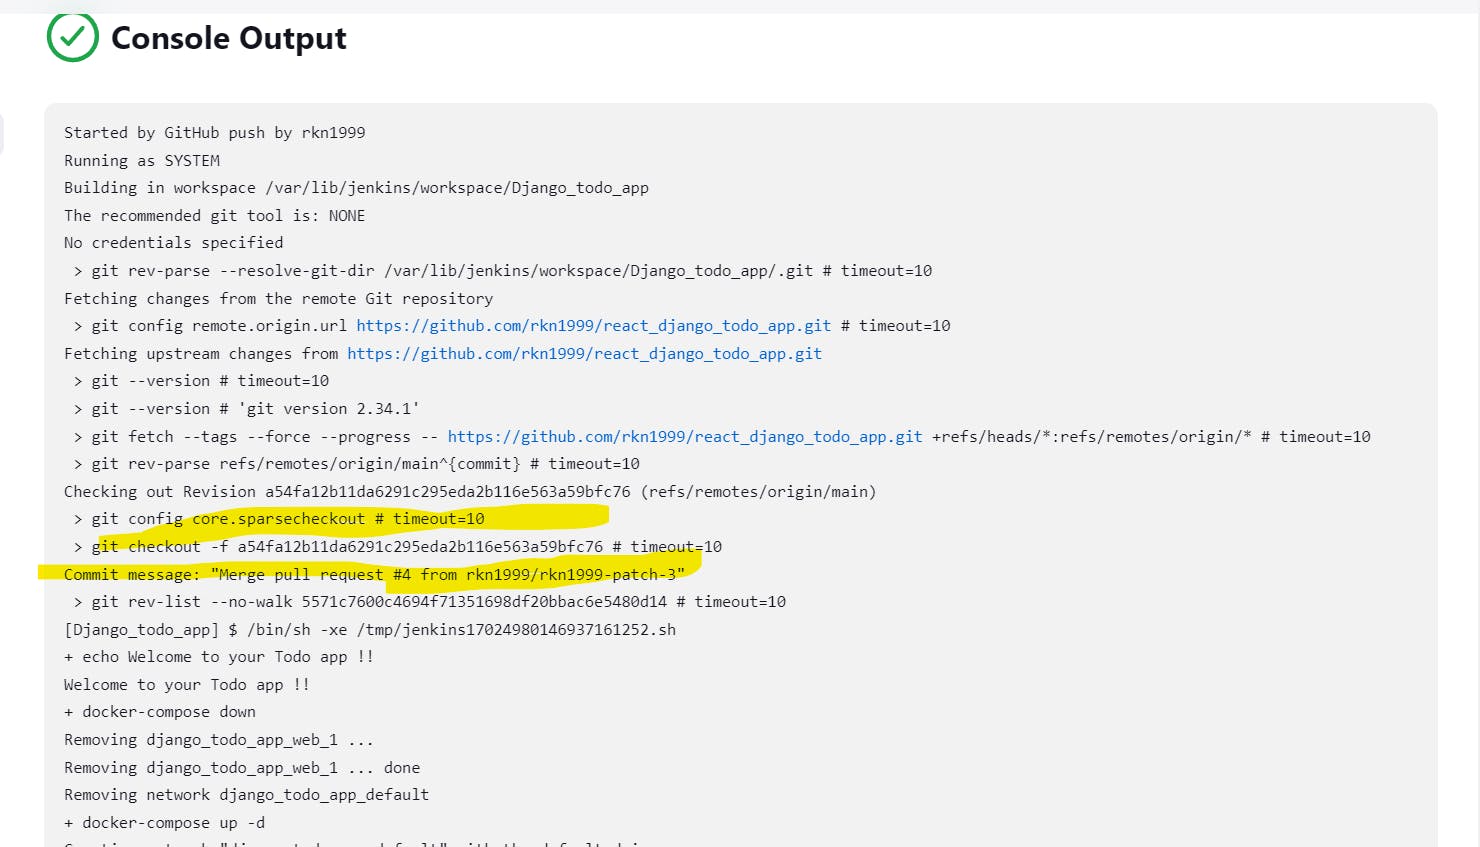
- And containers are up and running below:

Conclusion
I have tried to summarise the differences as a flow line :
CI(Continuous Integration) = Build + Test + Deploy
CD(Continuous Delivery) = Code push + Manual Intervention + Build + Test + Deploy
CD(Continuous Deployment) = Code push + GitHub Hook + Build + Test + Deploy